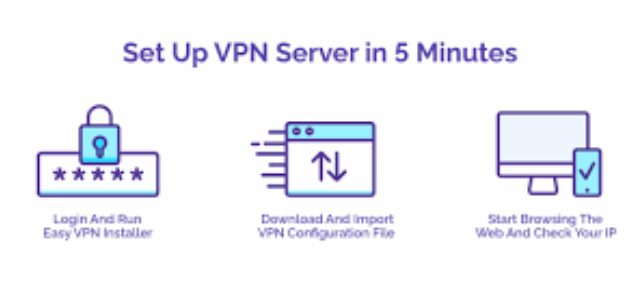
By setting up a VPN on VPS server, you can gain considerable control over your IP address, improve network security and privacy, and get around regional limitations without relying on third-party VPN services. If you’re looking for a dependable platform, colonelserver offers a solid basis for a VPN server with flexible resources, multiple data centers around the world, and simple server relocation. Parallel to this, virtual private servers, or VPS, have gained popularity due to their control and adaptability. If you value your online privacy, then you’ll need a VPN with a VPS for enhanced protection, privacy, and customized configurations. In this blog post, we’ll discuss how to install VPN on VPS.
What is a VPN on a VPS? A VPN or virtual private network helps you to create a secure online identity. It creates an encrypted connection between your device and a distant server to hide your IP address. As a result, your data will be protected from possible interception. A VPN guarantees your online actions stay confidential and safe.

Reliable Linux VPS Hosting
Perfect for Developers
On the other hand, with a VPS or Virtual Private Server, you’ll have more control because of having root access, dedicated resources, and the capacity to execute custom programs. A VPS is a virtualized server that replicates the features of a dedicated physical server in a shared hosting setting.
Hosting a VPN on VPS combines the benefits of both. By setting up a VPN on VPS server, you’ll have complete control over your VPN configuration. Also, you can benefit from security measures, better performance, and privacy. This approach eliminates reliance on third-party VPN providers, granting users autonomy over their data and connection protocols.
Why Use a VPS for Hosting Your VPN? First, you should know about VPN vs VPS. Then, you can take many advantages of VPS hosting with VPN, including:
Increased Privacy: By using a VPS for VPN, you eliminate the possibility of data leaks and guarantee that your browsing activities stay private. Dedicated Resources: A VPS allots specific resources such as CPU, RAM, and storage to your environment. It ensures consistent performance free from other users’ interference. Complete Control: With root access to your VPS, you can configure the VPN to your exact specifications, choose preferred encryption protocols, and implement custom security measures. Better Performance: VPS hosting typically offers better speed, uptime, and reliability compared to shared hosting environments. As a result, you’ll have a stable and responsive VPN experience.
How to Set Up a VPN on VPS Server Now, it’s time to answer how to install VPN on VPS? You’ll definitely be doing this for more control and privacy over your internet connection. Here, we mention how to configure VPN on VPS incorporating popular VPN protocols and steps applicable across providers like colonelserver, DigitalOcean, Linode, and AWS. Here are the steps you need to follow to set up a VPN:
Prepare these Requirements To create a VPN service using a VPS server, you need:

Debian VPS Server
Secure, Stable & Affordable
- VPS Server: Ensure your provider allows VPN installation.
- SSH Client: Use PuTTY (Windows) or Terminal (macOS/Linux).
- SFTP Client (Optional): FileZilla or WinSCP (recommended over FTP for security).
- OpenVPN Client: Required for connecting to the VPN.
- VPS IP address
- VPS username and password
1- Choose a VPS Provider If you’re looking for a VPS which is fast, secure, and has an affordable VPN setup, you can choose colonelserver for VPS. With plans starting at just $3/month, it can be an affordable option for hosting your VPN. Also, it has an easy setup process. There are also other good providers available including DigitalOcean, Linode, and AWS.
2- Create Your VPS Instance Setting up a VPS can be different with different providers, but totally, the steps are the same. Here we’ll mention how to set up your VPS instance with colonelserver:
- Sign up and access the colonelserver control panel.
- Choose a Windows or Linux distribution (Ubuntu or Debian are recommended for VPN setup)
- Pick a server location closest to your target usage region for optimal performance.
- Select an instance size—for a personal VPN, a small VPS is usually sufficient.
- Generate or upload an SSH key for secure access.
- Deploy your VPS and take note of the IP address, username, and password provided.
3- Connect to Your VPS via SSH For Windows, open PuTTY and enter the following details:
Host Name (or IP address): VPS server’s IP address Port: 22 Connection type: SSH Click Open

Reliable Linux VPS Hosting
Perfect for Developers
For macOS/Linux, open Terminal and run:
ssh username@your-vps-ip
Replace username with your actual VPS username. Enter your password when prompted (note that characters will not appear as you type for security reasons). If logged in successfully, you’ll see a command-line prompt.
4- Install OpenVPN Server on VPS To set up an OpenVPN server on your VPS, follow these steps:
- Open your SSH client and enter the following command:
wget https://git.io/vpn -O openvpn-install.sh && bash openvpn-install.sh
- Press Enter to execute the command. The system will begin installing OpenVPN on your VPS.
- Once the installation is complete, the command line will display a set of options. Choose: “Add a new client”
- To select this option, type 1 and press Enter.
- Create a New Client. The system will prompt you with Name. Enter a name for the new VPN client and press Enter.
- After the client is created, the system will display the location of the .ovpn file, which contains the necessary key to configure the VPN connection.
- To access the file contents in the SSH client, go to the folder containing the file using: ls
- Open the file by running: cat filename.ovpn
- Press Enter to execute the commands.
- The .ovpn file content will appear, starting with: client and ending with:
Your OpenVPN server is now set up.
5- Download the ovpn file with the key to the PC To download an OVPN file from a VPS server using an FTP client, follow these steps:
- Open your FTP client and enter the following details: Host: VPS server IP address Username: your login name Password: your password
- Click on the “Connect” button.
- Once connected, the FTP client window will show two sections: the left side displays folders and files on your PC, while the right side shows the folders and files on the VPS server. To download the OVPN file, simply drag it from the right side (VPS) to the left side (PC).
Note: On a Linux PC, the OVPN file will appear as a regular text file. On a Windows PC, it will display as an icon.
6- Create a VPN Connection To create a VPN connection for Windows:
- Install OpenVPN Client from openvpn.net.
- Copy the .ovpn file to C:\Program Files\OpenVPN\config.
- Right-click OpenVPN GUI and select Run as Administrator.
- Click Connect.
For Linux:
Run the following command in the terminal:
sudo openvpn –config ~/Downloads/client.ovpn
If the IP changes to your VPS’s IP, the VPN will work correctly.

