
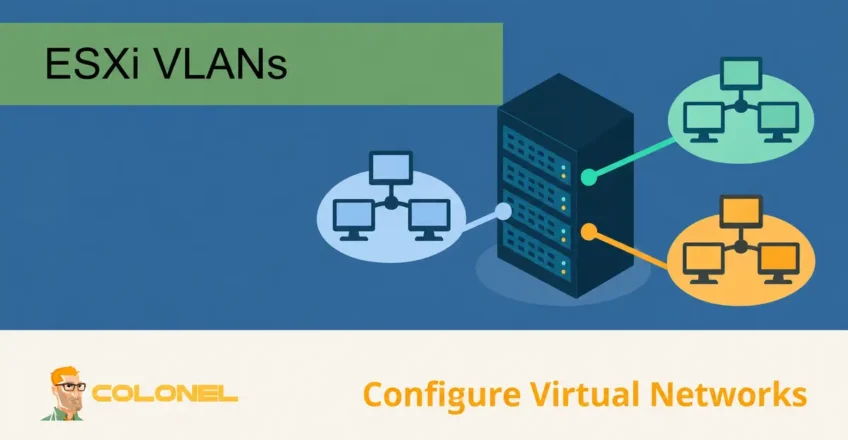
Understanding VLANs in VMware
A Virtual Local Area Network (VLAN) is a networking technology that allows devices to be logically grouped together regardless of their physical location within a network infrastructure. VLANs make it possible to separate traffic into isolated segments while using the same physical networking equipment.
In virtualized environments, VLANs are commonly used to improve security, simplify network administration, and optimize traffic flow between workloads.
By separating traffic into multiple logical networks, organizations can isolate departments, candidatures, services, or customer environments without deploying additional physical switches and cabling.
VLANs operate at Layer 2 of the OSI model and divide a single physical network into multiple independent broadcast domains. This approach provides greater flexibility and allows administrators to create secure and scalable network architectures.
Benefits of Using VLANs in VMware
Implementing VLANs within VMware environments provides several advantages:
- Improved network security through traffic isolation
- Simplified network administration
- Better performance through reduced broadcast traffic
- Easier workload migration between hosts
- More efficient use of physical networking resources
- Greater scalability for growing environments
VLANs are widely used in VMware infrastructures to separate management traffic, storage networks, systèmes de sauvegarde, production workloads, environnements de développement, and customer networks.

Hébergement Web WordPress
À partir de 3,99 $/mois
Requirements for VMware VLAN Configuration
Before creating VLANs in VMware ESXi, ensure you have access to the required components.
Option 1: Physical Server Deployment
Vous aurez besoin:
- A dedicated physical server
- Administrative or root-level access
- Ability to install VMware ESXi
- Network connectivity configured on the server
Many infrastructure providers offer unmanaged dedicated servers where hardware management is handled by the provider while operating system and virtualization management remain under your control.
Option 2: Existing VMware Environment
Vous aurez besoin:
- Access to a VMware ESXi host
- Autorisations administratives
- Existing VMware deployment
- Network interfaces connected to VLAN-capable switches
How VLANs Work in VMware ESXi
VMware ESXi uses virtual networking components to connect virtual machines to physical networks.
The primary components include:

Serveur VPS pas cher
À partir de 2,99 $/mois
- Virtual Switches (vSwitches)
- Port Groups
- Physical Network Adapters (vmnics)
- VLAN IDs
A virtual switch functions similarly to a physical switch, allowing virtual machines to communicate with each other and external networks.
Port Groups act as containers that define networking policies and VLAN assignments for virtual machine traffic.
Each Port Group can be associated with a specific VLAN ID, enabling traffic separation within the virtual infrastructure.
Étape 1: Access VMware ESXi
To begin configuring VLANs, connect to your ESXi host using its management IP address.
- Open a web browser.
- Enter the ESXi host IP address.
- Log in using an administrative account.
After authentication, the VMware ESXi Host Client dashboard will load, providing access to networking, stockage, machines virtuelles, and host configuration settings.
Étape 2: Configure Virtual Networking
Une fois connecté, navigate to the networking section.
Hébergement VPS Windows
Accès à distance et administrateur complet
- Sélectionner Réseautage from the left-hand menu.
- Ouvrez le Virtual Switches languette.
This section displays existing virtual switches and connected physical network adapters.
Understanding Virtual Switches
A virtual switch serves as the foundation of networking within VMware.
Depending on your hardware configuration, you may have:
- One physical network adapter
- Multiple physical network adapters
- Dedicated adapters for management traffic
- Dedicated adapters for virtual machine traffic
- Dedicated adapters for storage networks
Each virtual switch can be connected to one or more physical uplinks.
The number of virtual switches required depends on your network design and security requirements.
Étape 3: Create or Modify a Virtual Switch
If additional virtual switches are required:
- Cliquez Add Standard Virtual Switch.
- Assign an uplink adapter.
- Configure network settings.
- Save the configuration.
When using multiple network interface cards (NICs), ensure each uplink is connected to the appropriate physical switch port and VLAN configuration.
Proper physical switch configuration is critical for VLAN communication.
Étape 4: Create a Port Group
Port Groups are used to assign VLAN settings to virtual machine traffic.
To create a new Port Group:
- Accédez à Port Groups.
- Cliquez Add Port Group.
- Enter a descriptive name.
- Select the desired virtual switch.
- Specify the VLAN ID.
Exemples:
| Port Group Name | VLAN ID |
|---|---|
| Gestion | 10 |
| Production | 20 |
| Développement | 30 |
| Sauvegarde | 40 |
Each virtual machine connected to a Port Group will communicate using the associated VLAN.
VLAN ID Configuration Examples
To configure VLAN 20:
Port Group Name: Production
VLAN ID: 20
To configure VLAN 30:
Port Group Name: Development
VLAN ID: 30
To allow all VLAN traffic through a trunk:
VLAN ID: 4095
VLAN ID 4095 places the Port Group into trunk mode, allowing guest operating systems or virtual appliances to handle VLAN tagging directly.
Étape 5: Attach Virtual Machines to VLANs
After creating Port Groups:
- Open the virtual machine settings.
- Select the Network Adapter.
- Choose the appropriate Port Group.
- Save the configuration.
The virtual machine will now communicate using the VLAN assigned to that Port Group.
Configuring Network Settings Inside the Guest Operating System
Once VMware networking has been configured, the operating system running inside the virtual machine must be configured as well.
The example below uses Windows Server.
Configure Networking in Windows Server
Ouvrir:
Server Manager
Accédez à:
Local Server
Select the active network adapter.
Right-click the adapter and choose:
Properties
Ouvrir:
Internet Protocol Version 4 (TCP/IPv4)
Sélectionner:
Use the following IP address
Entrer:
- Adresse IP
- Masque de sous-réseau
- Passerelle par défaut
- Preferred DNS Server
- Alternate DNS Server (facultatif)
Exemple:
IP Address: 192.168.20.10
Subnet Mask: 255.255.255.0
Default Gateway: 192.168.20.1
Preferred DNS: 8.8.8.8
Alternate DNS: 1.1.1.1
Save the configuration.
The virtual machine should now communicate successfully within the assigned VLAN.
Verifying VLAN Connectivity
After configuration is complete, verify communication.
Recommended tests include:
Test Gateway Connectivity
ping 192.168.20.1
Test DNS Resolution
nslookup colonelserver.com
Test Network Reachability
ping 8.8.8.8
Successful responses confirm that the VLAN configuration is functioning correctly.
VMware VLAN Best Practices
To maintain a secure and efficient environment, considérer les recommandations suivantes:
Separate Critical Traffic
Use dedicated VLANs for:
- ESXi Management
- Storage Traffic
- Backup Networks
- Virtual Machine Traffic
- Monitoring Systems
Use VLAN Trunking Carefully
Only enable VLAN trunking when required and restrict allowed VLANs on physical switch ports whenever possible.
Document VLAN Assignments
Maintain clear documentation for:
- VLAN IDs
- Port Groups
- Virtual Switches
- Physical Switch Configurations
This simplifies future troubleshooting and administration.
Implement Redundant Uplinks
Where possible, use multiple physical NICs to provide redundancy and improve availability.
Monitor Network Performance
Regularly review network utilization and traffic patterns to identify bottlenecks or misconfigurations.
Managing VLANs in VMware Environments
VLANs provide an effective method for segmenting traffic within VMware infrastructures without requiring separate physical networks. By combining virtual switches, Port Groups, and VLAN IDs, administrators can build secure, évolutif, and highly organized virtual networking environments.
Proper VLAN design improves security, reduces unnecessary traffic, simplifies management, and provides greater flexibility when deploying and managing virtual machines across VMware ESXi hosts.