
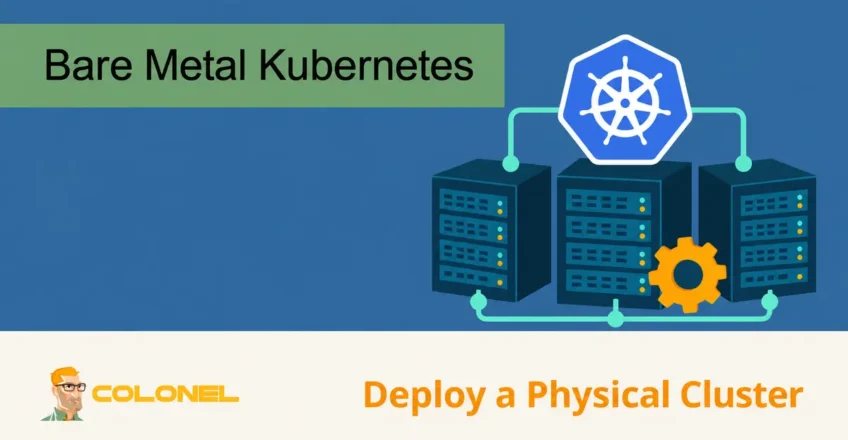
What Is Bare Metal Kubernetes?
Kubernetes has become the standard platform for orchestrating containerized workloads across modern infrastructure. As applications continue to grow in complexity, development teams need a reliable way to manage containers, networking, storage, and scaling without manually handling every component.
A traditional Kubernetes deployment typically runs on virtual machines, where a hypervisor sits between the physical hardware and the operating system. Bare metal Kubernetes removes this extra layer by deploying Kubernetes directly onto physical servers.
In a bare metal environment, Kubernetes clusters and workloads run on dedicated hardware without relying on virtualization technologies. This approach gives administrators direct access to server resources while reducing overhead introduced by virtual machines.
Because applications communicate directly with the underlying hardware, organizations often experience improved resource utilization, lower latency, greater operational control, and reduced infrastructure costs.
Advantages of Running Kubernetes on Bare Metal
Deploying Kubernetes directly on physical infrastructure provides several practical benefits for organizations that require performance, efficiency, and infrastructure control.
Improved Resource Utilization
Virtualization consumes CPU cycles, memory, and storage resources to operate the hypervisor layer. By eliminating this dependency, Kubernetes can use the full capacity of the underlying hardware.

WordPress Web Hosting
Starting From $3.99/Monthly
All available processor cores, RAM, storage devices, and network interfaces become directly accessible to workloads. This is particularly beneficial for environments with limited hardware resources or applications that demand maximum performance.
The reduction in overhead can result in faster application execution and better overall infrastructure efficiency.
Lower Network Latency
Latency-sensitive workloads often benefit from bare metal deployments because there are fewer layers between the application and the hardware.
Applications such as:
- Real-time analytics
- Machine learning workloads
- Large-scale data processing
- Video streaming platforms
- Telecommunications services
- Edge computing deployments
can take advantage of faster networking performance and more predictable response times.
Organizations that use GPU-accelerated workloads can also directly leverage specialized hardware without virtualization-related constraints.

Cheap VPS Server
Starting From $2.99/Monthly
Reduced Infrastructure Costs
Organizations that already own physical infrastructure can deploy Kubernetes without investing in virtualization platforms or cloud-based virtual machine services.
Bare metal environments eliminate many expenses associated with:
- Hypervisor licensing
- Virtualization management tools
- Managed virtualization services
- Additional virtualization overhead
For businesses operating existing on-premises infrastructure, this can significantly reduce long-term operational costs.
Greater Administrative Control
Running Kubernetes directly on physical servers provides complete visibility into system configuration and hardware resources.
Administrators have direct control over:
- Network architecture
- Storage configuration
- Security policies
- Access controls
- Hardware optimization
- Operating system settings
This flexibility allows organizations to tailor their infrastructure to specific workload requirements.
Windows VPS Hosting
Remote Access & Full Admin
Physical Workload Isolation
Certain industries require strict isolation standards for compliance, security, or performance reasons.
Bare metal Kubernetes allows workloads to operate on dedicated single-tenant hardware without sharing physical resources with unrelated systems. This level of separation can simplify compliance requirements and strengthen security controls.
Load Balancing Flexibility
Reliable application delivery depends on effective traffic distribution.
In bare metal Kubernetes environments, tools such as MetalLB and kube-vip can provide external load balancing functionality. These solutions distribute incoming traffic across available nodes and services, helping maintain availability and responsiveness even during periods of increased demand.
How to Deploy Kubernetes on Bare Metal
Deploying Kubernetes on physical servers involves preparing the infrastructure, installing Kubernetes components, configuring networking, and joining worker nodes to the cluster.
Prerequisites
Before beginning deployment, ensure the following requirements are met:
- At least two Linux servers running Ubuntu 18.04 or newer
- Root or sudo access on all servers
- Access to the APT package manager
- Terminal access to each system
- Reliable network connectivity between nodes
Kubectl is recommended for managing and interacting with the cluster throughout deployment.
Step 1: Prepare the Servers
Install the Operating System
Install a Linux distribution suitable for Kubernetes deployment. Common choices include:
- Ubuntu
- AlmaLinux
- Rocky Linux
- Debian
- CoreOS
Choose a lightweight and stable operating system to reduce unnecessary overhead.
Configure Networking
Assign a unique static IP address to every server participating in the cluster.
Verify that all nodes can communicate with one another through the network.
Configure Hostnames
Assign meaningful hostnames to simplify cluster management.
Update the following files on each server:
/etc/hostname
/etc/hosts
Example hostnames:
master-node
worker01
worker02
Step 2: Install a Container Runtime
Kubernetes requires a container runtime to execute workloads.
For Ubuntu systems, install Docker:
sudo apt-get update
sudo apt-get install docker.io
sudo systemctl enable docker
sudo systemctl start docker
Depending on your environment, alternative runtimes such as containerd may also be used.
Step 3: Disable Swap
Kubernetes expects swap memory to be disabled.
Run:
sudo swapoff -a
To prevent swap from returning after reboot, remove or comment out swap entries inside:
/etc/fstab
Step 4: Install Kubernetes Components
Add Kubernetes Repositories
Install required dependencies:
sudo apt-get update
sudo apt-get install -y apt-transport-https curl
Add the Kubernetes repository key:
curl -s https://packages.cloud.google.com/apt/doc/apt-key.gpg | sudo apt-key add -
Add the Kubernetes package repository:
echo "deb http://apt.kubernetes.io/ kubernetes-xenial main" | sudo tee /etc/apt/sources.list.d/kubernetes.list
Refresh package information:
sudo apt-get update
Install Kubernetes Packages
Install the required components:
sudo apt-get install -y kubelet kubeadm kubectl kubernetes-cni
Step 5: Initialize the Control Plane
On the server designated as the control plane node, initialize Kubernetes:
sudo kubeadm init --pod-network-cidr=10.244.0.0/16
After initialization completes, configure kubectl:
mkdir -p $HOME/.kube
sudo cp -i /etc/kubernetes/admin.conf $HOME/.kube/config
sudo chown $(id -u):$(id -g) $HOME/.kube/config
The initialization process will generate a join command that will be used later when adding worker nodes to the cluster.
Save this command for future use.
Step 6: Install a Pod Network
Kubernetes requires a networking solution before workloads can communicate across nodes.
Install Flannel:
kubectl apply -f https://raw.githubusercontent.com/flannel-io/flannel/master/Documentation/kube-flannel.yml
If your environment uses a different networking solution, replace the manifest URL accordingly.
Step 7: Join Worker Nodes
On each worker server, execute the join command generated during initialization:
sudo kubeadm join <master-node-ip>:6443 --token <token> --discovery-token-ca-cert-hash sha256:<hash>
Replace the placeholders with the values generated by kubeadm.
After successful execution, the worker nodes will register with the cluster.
Step 8: Verify Cluster Health
Confirm that all nodes are connected and ready:
kubectl get nodes
A healthy deployment will display the control plane and worker nodes with a Ready status.
Step 9: Deploy a Test Application
Create a sample NGINX deployment to verify cluster functionality:
kubectl create deployment nginxtest1 --image=nginx
Verify deployment status:
kubectl get deployments
kubectl get pods
Successful pod creation confirms that the cluster is operational.
Best Practices for Bare Metal Kubernetes Deployments
Select Appropriate Hardware
Infrastructure requirements vary significantly between workloads.
When choosing hardware, consider:
- CPU performance
- Memory capacity
- Storage performance
- Network throughput
- Physical location
- Expansion requirements
Benchmarking and capacity testing can help prevent resource exhaustion and performance bottlenecks.
Keep Hardware Current
Regular hardware maintenance and upgrades improve reliability, security, and long-term performance.
Monitor hardware lifecycle schedules and replace aging components before they become operational risks.
Continuously Monitor Cluster Performance
Ongoing monitoring provides visibility into resource consumption and application behavior.
Key metrics include:
- CPU usage
- Memory utilization
- Disk performance
- Network throughput
- Pod health
- Node availability
Popular monitoring solutions include:
- Prometheus
- Grafana
- Alertmanager
Automated alerting helps administrators respond quickly to emerging issues.
Implement Load Balancing
Clusters with multiple control plane nodes should include a load balancing layer to improve availability.
Solutions commonly used in bare metal environments include:
- MetalLB
- kube-vip
These tools help distribute traffic evenly while reducing the risk of service interruptions.
Automate Node Provisioning
Manual provisioning becomes difficult as infrastructure grows.
Automation platforms such as:
- MAAS (Metal as a Service)
- Tinkerbell
can streamline deployment processes, reduce configuration inconsistencies, and improve scalability.
Standardize Operating Systems
Using a consistent operating system across all nodes simplifies maintenance and troubleshooting.
Standardization helps ensure:
- Consistent patching
- Predictable behavior
- Easier upgrades
- Reduced compatibility issues
Maintaining a single approved operating system image across the cluster is generally recommended.
Establish a Backup Strategy
Hardware failures, configuration errors, and accidental changes can occur at any time.
Regularly back up Kubernetes state using etcd snapshots and store backups in multiple locations.
Common backup destinations include:
- Secondary datacenters
- Network storage
- Cloud object storage
- Off-site repositories
Reliable backups are critical for disaster recovery planning.
Consider Hybrid Infrastructure
Not every workload requires direct access to physical hardware.
A combination of bare metal and virtualized nodes can provide flexibility while still allowing performance-critical workloads to benefit from dedicated hardware resources.
Evaluate application requirements carefully when designing infrastructure architecture.
Important Considerations Before Deployment
While bare metal Kubernetes provides significant benefits, organizations should also account for operational challenges.
Increased Operational Complexity
Bare metal deployments require hands-on infrastructure management.
Tasks such as hardware provisioning, operating system maintenance, network configuration, and troubleshooting remain the responsibility of the operations team.
Limited Snapshot Functionality
Virtual machine environments often provide image-based backups and snapshots.
Bare metal systems typically rely on application-level backups, configuration exports, and etcd snapshots instead.
Node Failure Impact
Each node represents a physical server.
If hardware or operating system issues occur, workloads running on that server may become unavailable until recovery procedures are completed.
Backup and Migration Challenges
Migrating workloads between physical servers can require additional planning compared to virtualized environments.
Organizations should develop documented migration and disaster recovery procedures before moving production workloads to bare metal infrastructure.
Related Services
- VPS Server Hosting: https://colonelserver.com/vps-server-hosting/
- Cloud Servers: https://colonelserver.com/cloud-servers/
- Dedicated Server Netherlands: https://colonelserver.com/dedicated-server-netherlands/